Showing posts with label Healthy Things to Eat. Show all posts

Sunday, November 3, 2013

Asian Meatballs (Paleo)


These meatballs ARE FANTASTIC!!!
(May as well jump right into things...)

Last month I "went paleo" for several weeks.  Oh boy.  It confirmed many things to me, not the least of which being that my belly does not like gluten but my mouth sure does.  I'm having a hard time breaking up with bread.  And crackers.  And cheese.

During my "hunt" for paleo foods, I came across the award-winning website of Michelle Tam (Nom Nom Paleo).  Her recipe for Asian meatballs inspired mine.  If you're in need of some great paleo food ideas, please visit her site -- it's wonderful.

These meatballs have a high carrot-to-meat ratio; the carrots stay very crunchy during the short baking time, so if texture bothers you, either skip them or reduce the amount.  In my opinion, the carrots are the star of this recipe, along with the zing of the fresh ginger and the garlic.  I love the crunch. 


To stay away from soy but to retain that lovely soy-sauce flavor, I used coconut aminos.  BUT if you don't mind using soy sauce, it's a great substitute.   I'd say if you do use soy sauce try a lower-sodium version, being mindful that when you use 1/4 cup at a time, these little meatballs can get very salty very quickly.  

These meatballs are the perfect "emergency protein" to keep on hand.  I often mix them into salads.  Or when I'm feeling hungry at 4 pm and the Chocolate Monster is calling my name, I eat one or two cold straight out of the fridge. Shuts that noisy thing up every time.

(I usually double the recipe below because they freeze so well.)


Asian Turkey Meatballs (Paleo)
Makes 52 teaspoon-sized meatballs

1 pound ground turkey (substitute beef or bison)
3 medium carrots, peeled and finely chopped
3 cloves garlic, finely minced
3 green onions, chopped
1 heaping teaspoon chopped fresh parsley
6-8 fresh mushrooms, finely minced (I used button mushrooms)
1/4 cup (lower-sodium) soy sauce (I used coconut aminos)
1-inch piece fresh ginger, peeled and minced
1 tablespoon melted coconut oil (or olive oil)

Line two large rimmed baking sheets with parchment paper.  Set aside.

Preheat oven to 375 degrees F.

Add all ingredients to a mixing bowl.  Mix with your hands (or with a wooden spoon, although your hands will mix much more thouroughly).  The key here is not to over-work/over-mix the meat.  Just get all the ingredients incorporated and call it good.

Use a teaspoon to scoop the meat mixture into the palm of your hand and roll it into a ball.  Place meatball on baking sheet and repeat.  (Leave about 1 inch or so between the meatballs).

Bake meatballs for 15-20 minutes, or until the meat is no longer pink in the center (you'll have to cut into one to check).    

Serve warm.

Enjoy! 

Sunday, June 2, 2013

Raw Veggie Tartlet Bites


The past few weeks have found me bustling around the house with a paint brush in one hand and a caulk gun in the other.  We’re remodeling a bathroom whose shower has apparently been leaking since Nixon was in office.  The whole room had to be demolished down to the studs.  Good times. 

(I'm thinking about starting another blog called, "Blood, Sweat, and Caulk:  Exhausting Yourself One DIY Project At A Time".)
 
In the meantime, my energy meter has been pegged out at "zilch".  I can't even remember the last time I actually made a true and decent meal around here.  (In other news, my kids, who because of my busyness have been served fast-and-easy things like chicken nuggets, macaroni and cheese, sandwiches, and cereal, have recently commented that they think I'm starting to be a great cook again.  I am not amused.)

All that to say that I'm glad it's Secret Recipe Club time again.  It got me back into the kitchen, just in time to make these colorful, crunchy bars for a church picnic today.  

I was assigned to Margaret's blog: "Tea and Scones".  Margaret has a vast array of wonderful items (from all over the globe!) to choose from.  I made my selection based on what I had on hand:  Brenda's Veggie Bars

I made a few modifications to the recipe including swapping out the crescent roll dough for puff pastry sheets, adding pesto to the cream cheese/mayonnaise mixture, and topping with feta cheese.  

To begin, I thawed a sheet of puff pastry dough (overnight in the fridge), rolled it out slightly, and pricked it with a fork to prevent it from puffing while it baked.

Then I mixed cream cheese, mayonnaise, pesto and salt.

(I found this little gem as I was downloading my camera.  Somebody borrowed my camera while I was folding laundry as the pastry baked.) 

Despite the fork pricks, the pastry still puffed.  I simply applied pressure to the top of the pastry as soon as I removed it from the oven and gently deflated it.

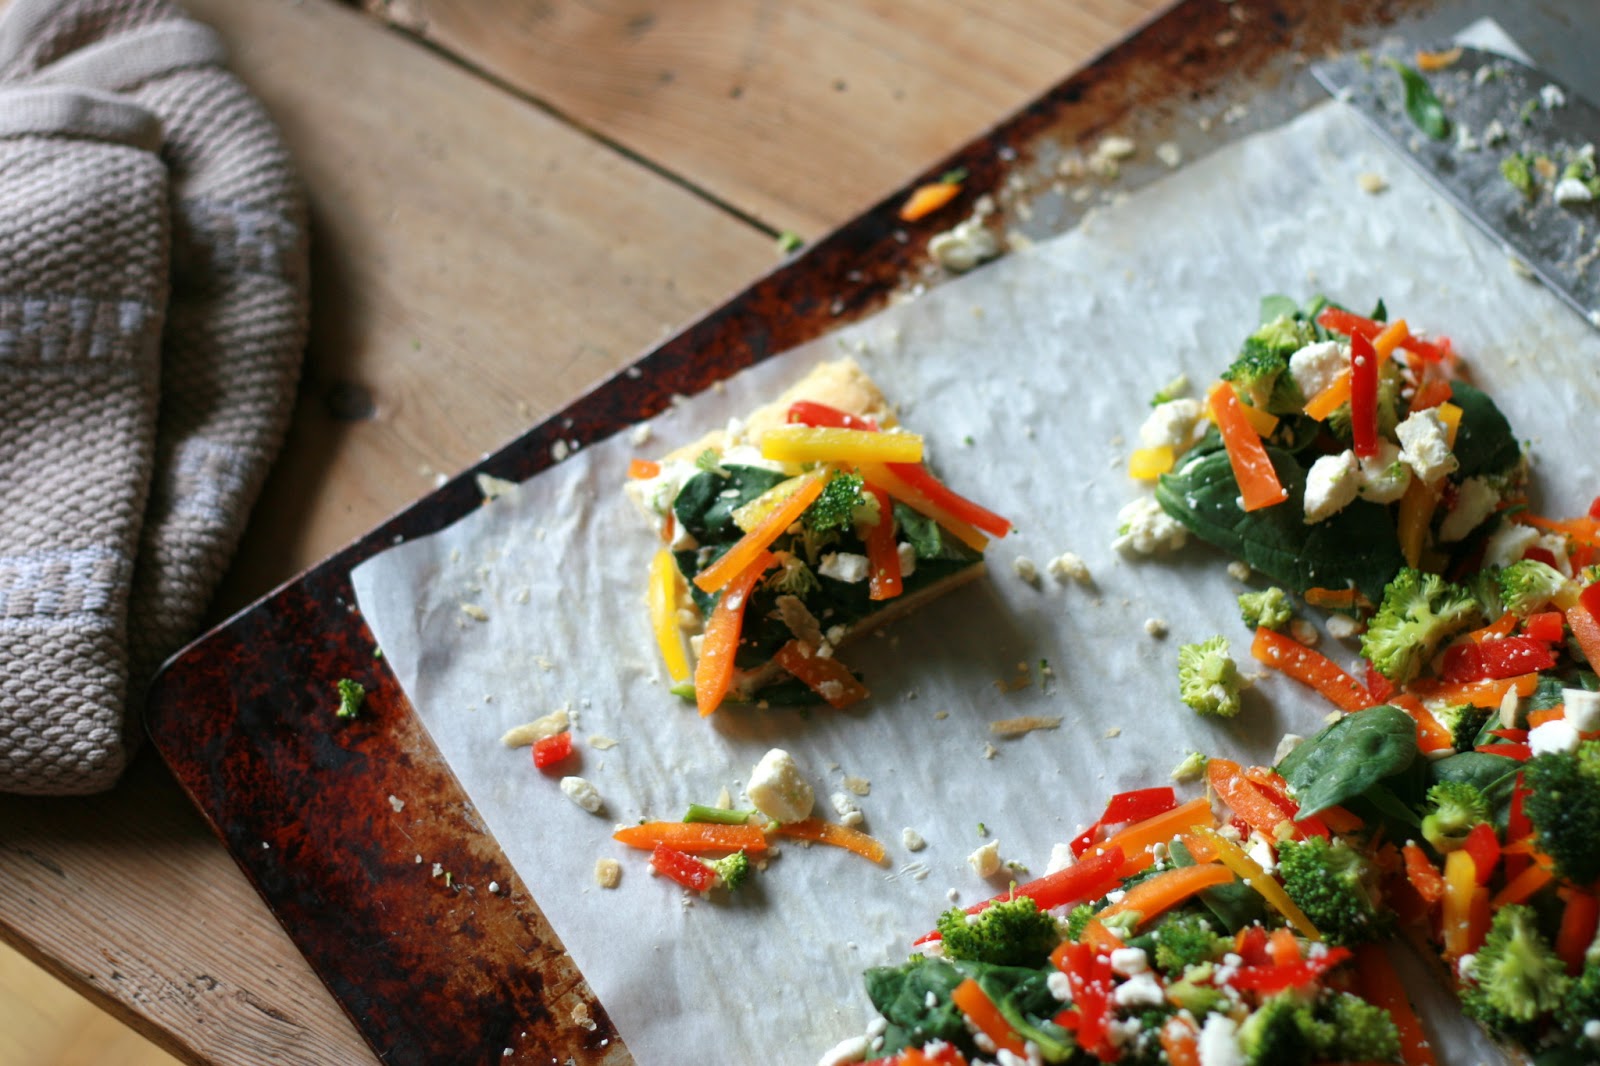
I chopped a colorful array of fresh veggies.  Don't you just love to eat happy summer colors?

After spreading the (cooled) pastry with the cream cheese mixture, I added a layer of spinach,

Scattered over the other vegetables,

And sprinkled with feta cheese.

Then I cut the pastry into 16 two-inch squares.

A cool and refreshing accompaniment to a summer meal!

Raw Veggie Tartlet Bites
Yields 16 two-inch squares
1 sheet frozen puff pastry, thawed (I used Pepperidge Farm's brand)
1 (8-ounce) package cream cheese, softened
1/4 cup mayonnaise
2 teaspoons pesto (use more to taste, if desired)
1/4 teaspoon sea salt
1 cup packed fresh baby spinach leaves
1 and 1/2 cups (total) chopped fresh vegetables (I used broccoli florets, and red, yellow, and orange bell peppers)
1/3 cup feta cheese (substitute Parmesan or your favorite cheese)

To prepare: preheat oven to 400 degrees F.  Line a baking sheet with parchment paper.  Slightly roll out the thawed puff pastry dough.  Prick pastry thoroughly with a fork.  Bake for 12-15 minutes, or until golden brown.  Remove pastry from oven and allow to cool to room temperature.

Mix cream cheese, mayonnaise, pesto and salt together until smooth (I used my electric mixer, but a sturdy wooden spoon would do the trick as long as the cream cheese is at room temperature).  Spread mixture over cooled pastry.

Lay spinach leaves over cream cheese mixture.  Scatter fresh vegetables over spinach, and sprinkle with cheese.  

Cut the pastry into four large squares (one slice down the center vertically and then another horizontally).  Then slice each square into quarters.  You will end up with 16 small squares.  

Serve immediately or refrigerate for up to 2 hours.  (Pastry may become soggy after 2 hours.)

Recipe from:  Tea and Scones/variation of a recipe from a 1990s Southern Living recipe.

Monday, March 4, 2013

Chocolate-Coconut Balls (Dairy-Free, Nut-Free, and Gluten-Free))


For this month's Secret Recipe Club, I was assigned to Veena's blog:  Veg Nation:  An Ode to Vegetarian Food.   Veena lives in India, and I had big plans to make one of her authentic Indian recipes.   I've been teaching my boys a lot about other cultures, and this month we happened to be studying India. The boys and I were going to take a trip to our local (authentic) Indian grocery store and learn as much about their food as possible.


I had it all worked out in my mind:  it was going to be  perfect!   

But I foolishly procrastinated.  And then today, the day I planned to go to the Indian grocery (3 days before the reveal date), Timothy got a stomach virus, and I was hit with the realization that if I were to also get sick, there's no way I could make the Secret Recipe Club deadline.

So I had to scrap the authentic Indian cooking dream and go with something more familiar to me:  chocolate. 


And Veena's Chocolate Coconut Ladoo are delicious.  (Ladoo (also written as Laduu) refers to an Indian sweet treat that is rolled into bite-sized balls.) 

Due to some dietary changes that we've had to make around here, I swapped out the sweetened condensed milk that Veena used with a homemade sweetened condensed coconut milk.  Also, Veena used 2 tablespoons of drinking chocolate...I used 3 tablespoons of straight cocoa to avoid the dairy that was lurking amongst every version of powdered "drinking chocolate" I had in my pantry.   


I am not much of a microwave user, but I followed Veena's microwave instructions to the letter and was grateful for them.  The microwave saved me a lot of preparation time as I spent most of my morning running back and forth from the kitchen to Timothy's sickbed.

Thanks, Veena!  As soon as possible, my children and I will be back to your blog to study Indian culture and food!


Chocolate-Coconut Balls (Dairy Free, Nut Free)
Makes 16 tablespoon-sized balls

1/2 cup sweetened condensed coconut milk
1/4 cup water
1 1/2 cup shredded (unsweetened) coconut + additional 1/4 - 1/2 cup for rolling
3 tablespoons unsweetened cocoa powder

In a microwave-safe bowl, mix the condensed coconut milk and the water.  Cover with a paper towel (it may splatter while it's cooking) and microwave the mixture for 2 minutes.  Carefully remove the bowl from microwave.

Whisk the cocoa powder into the milk/water mixture.  Once the mixture is smooth, add in the shredded coconut.  Stir well and microwave for about 2.5 minutes, stopping to mix every 30-45 seconds.  The mixture will be thick.

Carefully remove bowl from microwave and allow mixture to cool for 5-10 minutes.  When cool enough to touch, scoop out tablespoon-sized amounts of the mixture and roll into a ball between the palms of your hands.

Place 1/4 to 1/2 cup of shredded coconut in a shallow bowl. 

Roll the chocolate-coconut balls into the shredded coconut to coat.

Serve warm or at room temperature.  Store uneaten treats in the refrigerator. 

Recipe slightly adapted from:  Veg Nation


Friday, February 22, 2013

Double Chocolate Coffee "Creamer" (It's "Skinny" and Vegan)

This girl loves her coffee.

At one time, I had every "International Delights"  flavor in my refrigerator door. 

But when I decided to cut processed foods and chemicals from my diet, those things were the first to go.

Organic/homemade coffee creamers have been flooding the internet.  

So I decided to throw my little hat in the ring, too!

But I wanted my version to be dairy free and "skinny", since I am on a mission to rock wear a swimsuit this summer.

Introducing my Double Chocolate "Creamer".  It's "skinny" (approximately 40 calories per 1/4 cup), and it's vegan (made from almond and coconut milks).  

While it won't lighten up the color of your coffee the way a traditional milk-based creamer will, if you can get past that mental hurdle, I think you'll really enjoy this stuff.  I suggest starting with ratio of 6 ounces of coffee to 1/4 cup of creamer.  (You could always add extra coconut milk or splurge and add heavy cream.)  

And don't worry---you can't taste the flavor of the maple syrup at all.


Double Chocolate Coffee "Creamer" (It's "Skinny" and Vegan)
Makes a little over 2 cups

1 cup coconut milk (I used Silk PureCoconut)
1 cup dark chocolate almond milk (I used Silk PureAlmond Dark Chocolate)
1 tablespoon cocoa powder
2 tablespoons pure maple syrup (NOT pancake syrup)

In a saucepan set over medium heat, whisk together all ingredients until cocoa powder has been incorporated. 

Transfer to glass jar or container.  Use immediately or store, refrigerated, in a glass jar or other container for up to 7 days.

(For a "peppermint mocha" spin, add 1 teaspoon of pure peppermint extract the saucepan has been removed from the heat source.)


P.S. - While I realize that the coconut and almond milks can be considered "processed", I'm choosing to not be nit-picky about that little fact.  :)

This recipe was my inspiration:  I just swapped out the milks to make mine vegan.

Wednesday, February 6, 2013

Beet and Butternut Squash Salad with Maple-Cinnamon Dressing

 
I am so ridiculously out of breath.  

Just finished working out.  

And I wanted to get this posted while the kids are still playing happily together.  They haven't noticed that I've stopped maniacally dancing around the living room.

I just need to hurry up and spread the word about this salad.  It was so different...in a great way.  Crunchy.  Slightly sweet.  Pretty colors.  And the boys even ate the raw beets.  (Word of caution:  don't freak out (like I did) after your kids eat beets and later use the restroom.  Just remember: beets are magenta...going in and coming out.)

The pecans are slightly toasted...but that's all the "cooking" that goes into this salad.  Everything else is raw.  

I used the food processor to "shave" the vegetables really thin.  You could also use a grater box or just slice them very thin with a good knife. It might be a good opportunity to use your mandolin, if you have one. 

The dressing rocks: olive oil, balsamic vinegar, a bit of maple syrup (the pure stuff, not pancake syrup), cinnamon, Dijon mustard, salt and pepper.  The ingredients sound freaky together, but seriously --I can't stop eating it.

OK.  I've said enough.  Please go make this.  It will blow your socks off.

(FYI: The colors from the beets will run once they are mixed with the squash.  If it's going to be awhile before you serve the salad, keep the beets and squash in separate bowls and toss together just before serving.)


Printable Recipe

Beet and Butternut Squash Salad with Maple-Cinnamon Dressing and Toasted Pecans
Serves 3-4

Salad:
1 cup pecan halves
1 large beet, peeled
1/2 pound butternut squash, peeled (left in slightly larger chuncks so you can shave or grate it)
1/4 cup roughly chopped fresh spinach
1/8 cup chopped fresh flat-leaf parsley

Dressing:
1 tablespoon extra virgin olive oil
1 tablespoon balsamic vinegar
3 teaspoons pure maple syrup
1 teaspoon Dijon mustard
1/8 tsp cinnamon
Kosher salt and fresh black pepper, to taste

Toast the pecans in a dry (ungreased) frying or saute pan over medium-low heat for 3-4 minutes.  Allow them to become warm and fragrant, but don't let them burn.  Remove them from the pan and set aside.
 
Cut the beets into chunks that will fit into the feed tube of a food processor fitted with a shredding or shaving disc.  Shred or shave the beets and set them in a large stain-proof bowl (glass, stainless steel, etc.)

Cut the squash into chunks that will fit into the feed tube.  Shred or shave the squash.  If serving the salad right away, add the squash to the bowl with the beets.  Then add in the parsley, spinach and pecans.  (Don't toss yet.)

In a small measuring cups, whisk together the ingredients for the dressing.  

Immediately before serving, pour the dressing over the shredded/shaved veggies and spinach, parsley, and toasted pecans.  Toss gently. 

(Serve immediately, before the colors have a chance to run.)

 Recipe slightly adapted from:  The Perfect Pantry/Apron Strings

Wednesday, September 12, 2012

Honey-Cinnamon Applesauce and "COTC"


Our dear friends recently blessed us with 18 pounds of local apples; sweet, petite, and imperfect little jewels that were tough enough to survive the desperate drought that gripped Arkansas this summer.


Hope you like apple recipes because I've still got 15 pounds to go!

You may have noticed that I'm on a little "do it yourself" kick in the kitchen.  Products that for years I've mindlessly swooped off of the grocery store shelves and into my shopping cart--chocolate syrup, graham crackers, almond butter--I'm realizing with great joy and zeal how simple they are to make at home.  It definitely takes more time, which like most American moms of young children, I'm in short supply of.   And frankly, my kids don't really even love all of these homemade things, which annoys me and attempts to injure my pride.   Timothy (6) would much rather have Hershey's Chocolate Syrup then my homemade version.  And because all I'm offering is my homemade version, he has been on a chocolate milk boycott for the last 2 weeks.  But I'm pretty sure he'll eventually come around.

As the main shopper, cook and meal-provider in this house, I've made the decision (with my husband) to "COTC" (Cut Out The Crap).  And believe me--it hasn't been easy on us as my husband, Chris, has had Kellogg's Frosted Flakes for breakfast every day for the last 10 years.  He not-so-secretly mourns the loss of many of his food "friends" (Mrs. Baird's white bread, Welch's Strawberry Jelly, and Peter Pan Peanut Butter), but he agrees that we're doing the right thing for our bodies. 

You don't have to search long to find large movements of people--across all political persuasions--getting fed up with a food industry whose highest priority is how quickly and cheaply they can produce food and how long they can make it last on the shelves.   (I believe that capitalism is a beautiful thing and that people should take personal responsibility for what they put into their bodies.  But there is a huge need for us to be informed about what we are eating.  Until recently, even I--the cooking-crazed, make-it-from-scratch-woman--was clueless.) 

It seems high fructose corn syrup is an ingredient that has initially taken the biggest hit by consumers who refuse to purchase products that contain it.  You'll notice items from cereals to breads to juices and "fruit snacks" whose packaging proudly tout it's absence.  Spend a little time researching how this sweetener is produced.  Knowledge might be all you need to quit eating it.  

A precious friend of mine is suffering with the exact (rare) form of brain cancer that killed my father.  Want to know what ingredient his mainstream, conventional-medicine doctor told him to STOP INGESTING IMMEDIATELY?  High fructose corn syrup.  A UCLA study found that while tumor cells "thrive" on sugar, they "proliferate" on fructose.  (Here's an article about a study that backs up that imperative.)  That was all I needed to hear.  

Are considering making the switch to "COTC" and eating more "real foods" and less packaged/processed foods?    

Are you feeling completely overwhelmed and have no idea where to start?  

My suggestion is START SMALL.  Begin looking at labels.  Don't buy food that contains high fructose corn syrup.  And if the labels contains words you have to sound out, put the product back on the shelf.  Have a long term goal in mind and take baby steps toward it.  

Mutiny may break out among your household.  My children literally started crying when I told them that we wouldn't be buying any more "soft white bread" from the store.  I patiently and lovingly explained to the boys why we can't eat it anymore.  I try to substitute plenty of "real" treats that they enjoy so they don't feel completely deprived and want to shoot "real food" the finger. 

Like Mark Twain said, I would have written a shorter letter, but I didn't have time.  It was not my intention to carry on for seven paragraphs...sorry about that.  I'm in an awkward transition period here in my kitchen, taking to heart all of the information I've been gathering over the last few months and translating it into reality. I'm literally taking it one recipe at a time.  

Do you want to join me in this pursuit of eating better?

If you'd like more information about taking the Real Food Plunge, this website is a great place to start.  But if you get overwhelmed by looking at it, just go back to my idea of reading labels and cutting out high fructose corn syrup and the "unpronouncables".  Baby steps, my friend.  Baby steps.

And now back to the applesauce.  You can find good applesauce at the store, no doubt.  But when you are being stared down by 18 pounds of apples, making applesauce just seems like the right thing to do.

(And this was the absolute best applesauce I've ever tasted.  Even my husband agreed.  The kids...not so much.  For realEating crap warps our taste buds.  I'm having to "detox" the kids' palette's, allowing their little mouths and minds to enjoy real food. ) 

To make this delicious stuff, after peeling the apples, I cut them in half and used a melon baller to scoop out the core.  Then I sliced the apples into 1/2" thick slices.
Tossed the apples, lemon juice, a 1/2 cup of water and a cinnamon stick into a sauce pan.

I also added in a few of the peelings.  It gave the finished product a slightly rosy color.

After it had cooked for about 20 minutes and the apples were tender but not mushy, I removed the apple peelings and the cinnamon stick.  Then I put the apples into the food processor.  I processed until they were velvety smooth.  (The texture is up to you...depends on how long it's processed.  You can also use a blender or just a potato masher.)  I added a tablespoon of honey and processed for another 30 seconds.  

And...voila

This recipe can easily be doubled or tripled.

Here is the printable version of the recipe.

Honey-Cinnamon Applesauce
Makes 2 cups


3 pounds apples*, peeled, cored and cut into 1/2" slices
1 tablespoon lemon juice
1/2 cup water
1 (3" to 5") cinnamon stick (or about 1/2 teaspoon ground cinnamon)
1 tablespoon honey

As you cut the apples, place them in a non-reactive bowl (glass or plastic).  Place the lemon juice in the bowl and stir the apples with the juice as you add them to the bowl.  This will prevent them from browning.  (You can also lay a piece of plastic wrap on top of the sliced apples to lessen the amount of air they come in contact with.)

In a large saucepan over low heat, combine the apples, water, lemon juice (if you didn't add it earlier to the apple slices), cinnamon stick, and a few of the apple peelings, if desired. (If you are using ground cinnamon, wait to add it until you process the applesauce.)  Simmer the apples over low heat, stirring often, for about 20 minutes.  

At this point you can have "chunky" applesauce and simply mash the cooked apples with a potato masher or a large spoon.  Or, you can transfer the cooked apples to a blender or food processor.  Process until desired consistency is obtained.  Then add the honey (if needed for sweetness) and the cinnamon.  Stir until well-mixed.  

Serve applesauce warm or refrigerate it for up to 3 days.  This is a wonderful recipe to "can", if you are so inclined!


*You can use one type or a mix of McIntosh, Fiji, Golden Delicious, Granny Smith, etc.

Monday, September 10, 2012

Homemade Almond Butter


Homemade almond butter requires three things:  almonds, a food processor (or a hefty blender), and about 10 minutes of your time.
I used 12 ounces of almonds.  The almonds (or other nuts) can be raw, roasted, salted, etc.  Whatever you prefer. 

When you begin processing, the almonds will clump together at first.  You'll have to stop and scrape down the sides of the food processor bowl several times, especially in the beginning.

 (The almonds during their lovely, creamy transformation...)


And before you know it (after 8-10 minutes of processing), you've got almond "butter".

Pure and simple.


(Wouldn't this make a great gift?)

Here are some other goodies to consider making at home:
Homemade Graham Crackers
Homemade Chocolate Syrup

---------------------------------------------------
Printable Recipe

Homemade Almond Butter
(Makes 1.25 cups)

12 ounces whole almonds

Place almonds in food processor and turn it on.  Almonds will begin to clump together after about 30-45 seconds (keep in mind that food processors will vary in performance/processing time).  If the blade is spinning and the almond bits appear to be "stuck" in place, stop the motor and scrape down the sides of the bowl with a spatula.  You may have to stop the processor to scrape down the sides every 10-20 seconds in the beginning.  The longer the almonds are processed, the more liquified they become.  I processed these almonds for 9 minutes, resulting in a very smooth "butter".

Sunday, August 26, 2012

Rose Water Greek Yogurt


Roses are so gloriously romantic and mysterious and heavenly-scented that I can hardly keep them out of my thoughts.

And out of my food.

Say what?

Rose water.  Have you ever tried it?

Rose water is scented water made with rose petals.

----Please bear with me as I shift gears here for a moment----

I've been trying to eat less sugar lately. 

I find the hardest part of the day to stiff-arm the sweet beast is in the afternoon, when all I want to do is violently rip the foil wrapper off every chocolate baking bar in the pantry and consume each square. 

Today I was scanning the fridge for something--ANYTHING--to eat that would satisfy my afternoon desires.

I used plain Greek yogurt in a delicious chicken salad recipe that I'll share later this week.  An almost-full container of the yogurt stared back at me from the wire shelf.

But I'm not "cool enough" yet in the sugar-free realm to eat plain Greek yogurt.  It doesn't sit well with me.  But I knew there was some way I could "doctor it up".

Enter rose water (and the teensiest teaspoon of agave nectar).


Simply delicious.

(And the sugar beast is quiet.)


(This "doctoring" of plain Greek yogurt could also be achieved with almond extract, pure vanilla extract, or any other lovely flavoring your heart desires.)

Rose Water Greek Yogurt
Serves 1

1 cup plain Greek Yogurt
1 teaspoon agave nectar (or other natural sweetener, if desired)
1/8 to 1/4 teaspoon rose water

Mix together.  Inhale.  Hear the angels sing.  Enjoy.

Friday, August 17, 2012

Cheesy Quinoa-Veggie Nuggets


I love tricking my kids into eating fun little things that are full of vegetables.  (Like these sneaky chocolate chip cookies.) 

I get a deep, wicked thrill out of seeing them enjoy what I know encourages their bodies to grow like Johnson grass on a hot summer day.

Sometimes I don't have to do much tricking.
(That's Matthew...my veggie lover who does not have any issues with texture.)

His big brother?  Not so much.

I saw a recipe on this blog and immediately decided to try it out on my little guinea pigs.

The results?  Matthew devoured them and Timothy remains a little wary.   Timothy's friend, Mason, was spending the night.  He decidedly did not like them (but was very polite about his disgust).

"Ms. Ginny," Mason said.  "These are like chicken nuggets...with food in them.  They're kind of all wrong."

Gotta love the honesty of kids. 

Personally, I thought they were incredible and want to eat them for breakfast, lunch, and dinner.  Every day.

Here's how I did it.

I added a 1/2 cup of quinoa to 1 cup of boiling water and cooked it for about 12 minutes.
While the quinoa was cooking,  I prepped the veggies:  grated 4 carrots (to yield 1 cup), sliced two stalks of green onion, minced two cloves of garlic, and chopped the fresh parsley.

I mixed these pretty colors together, along with two very well beaten eggs and the cheeses.

In a tiny separate bowl, I whisked together the dry ingredients,

 And mixed them in with the veggies.

Then I scooped tablespoon-fulls into a greased mini-muffin tin.


VERY IMPORTANT: I've learned over the years that you must cover quinoa-containing recipes with foil as you bake them.  Otherwise the quinoa that's exposed to the direct heat will get crunchy, dried out, and undesirable.

They're the perfect size for little fingers.

(You can also make this as a casserole.  Yum.  Or swap out some of the veggies:  steamed broccoli florets would be wonderful in here.  The original recipe used cilantro instead of parsley, which I will try soon.  Try swapping out the cheeses to yield different flavors, too.) 

This Cheesy Dipping Sauce is a particularly lovely accompaniment. 

Here's the printable recipe.

Cheesy Quinoa-Veggie Nuggets
Makes about 24-28 mini-muffin size portions

2 cups cooked quinoa*
1 cup shredded carrots (about 4 medium carrots)
2 stalks green onion, sliced
2 cloves garlic, minced (about 2 teaspoons)
1/8 cup chopped parsley (a small handful)
1/2 cup grated Parmesan cheese
1/3 cup grated mozzarella cheese
2 large eggs, well beaten
2 tablespoons whole wheat flour (substitute all-purpose or your favorite gluten-free alternative)
1/2 teaspoon salt
Freshly ground black pepper to taste

Preheat oven to 350 degrees F.

Grease a mini-muffin tin with vegetable oil or cooking spray.  Set aside.

Mix the quinoa, carrots, green onion, garlic, parsley, and cheeses together until well blended.  Stir in the beaten eggs, mixing well.  In separate bowl, combine the remaining dry ingredients with a whisk.  Then stir the dry ingredients into the quinoa mixture.  Mix well.

Use a tablespoon to scoop the mixture into the prepared muffin tin.  Cover tin with foil and bake for 15-20 minutes.  


*To end up with two cups of cooked quinoa, begin with 1/2 cup uncooked quinoa prepared in 1 cup boiling water.

Recipe ever-so-slightly adapted from So Very Blessed